Skills
Rusted Metal
Today's test was to create a rusted metal texture by painting it in photoshop
 |
| This is our referance |
 |
| To create the background I chose a base colour and used a filter. |
 |
| adding patchiness and rust by using brushes at different opacitys and turning on angle jitter |
 |
| Used blending tools.Bevel and emboss with inner stroke and inner glow. |
Creating stones in 3ds max

These are my stones I went for a pebble and put a bunch of them together like you would when making a campfire.
To creating these I used boxes and applied the turbo smooth modifier.The textures are just mental ray textures edited to make them look like stones.
This has taught me to use form to create interesting images and perspectives.
Painting yarn in photoshop
Today we were tasked with making a yarn texture in photoshop.
 |
| This was our reference image. |
 |
| This is my final texture. |
To create this texture I painted a small knot of yarn and copied it a bunch of times rotating them to get a natural bend shape.Once i'd made one strand I copied that strand a bunch of times and used hue and saturation to change their colours.I like this texture it looks similar to the original but my only problem with it is you can tell its painted if I spent more time on it I could make it look more realistic.
This has taught me spending more time and attention on a texture/material can allow you to make it more realistic
Cloud

This is my cloud texture placed onto a plane and rendered in 3ds max.
this has taught me how to create and render a cloud texture which will be helpful for creating scenes that are outside.
Eggshell
We were tasked with making a eggshell by painting it in photoshop.
 |
| My reference image. |
 |
| My ellipse with parts erased to create a cracked shell |
 |
| The inside of the egg is visible so I will copy my egg rub it out to the edge and then change it to a light Gray/white. |
 |
| Inside shell placed in correct position. |
 |
| Dots and imperfections added using low opacity brushes. |
 |
| added some shading to make my egg shell realistic |
 |
| Made some more shell to create a whole egg cracked in three. |

I am pleased with my eggshell it looks highly realistic. To create this I made an ellipse and erased the parts I didn't want and created a jagged edge.
This has taught me how to paint using tone and 3D.
Honey Comb
Today we are going to create a honey comb texture in photoshop.
 |
| Gradient with two different shades of honey. |
 |
| Different tone of honey. |
 |
| The hexagons that make up the honey comb. |
 |
| Copied and pasted multiple times. |
 |
| Recoloured from white to a lighter yellow than the honey |
 |
| Drop shadow for realism. |
 |
| Inner glow on honey to make it more golden. |
The issue with this is the honey comb mesh is to sharp although honey comb is hexagonal is not perfect so im going to use the smudge tool too add warps in the lines.

The warped lines add a lot of realism because they wouldn't be symmetrical in reality I used the smudge tools to warp the lines and make them all different.
This has taught me how to use shapes to create realistic images and materials also how to use some of the brushes I haven't used before.
Cardboard
 |
| Filter Texturize on the background layer to add a good base texture in my opinion it looks better than noise |
 |
| Rectangle select then using a low opacity brush to add tone. |
 |
| finishing off the shading. |
 |
| added light tone to add depth so it looks corrugated. |
 |
| Added speckling to make it look more realistic. |


This is my cardboard texture finished I am happy to have it done if I wanted to I could go back and make it look better by making the corrugations thinner so there are more of them but I am not interested in this texture so I will leave it like this.
This taught me that tone and different colours can create realism and help creating materials.
Bark


To create this texture I used a lot of filters and different image adjustments but mainly I used channels which was hard to understand at the beginning but I managed to make it work and my texture looks fantastic.
Landscaping in Unreal Engine
 |
| New level.Navigate to the landscape tap and choose a material then click create. |
 |
| to create this mountain I used to sculpt tool to sculpt the landscape how I wanted it. |

 |
| Create smaller mountains and hills. |
 |
| use smooth to make the mountains more natural and smooth. |
 |
| click play and roam around. |
this has taught me how to make landscapes and maps in unreal.
Armchair
 |
| Simple box sizes 70,70,70 |
 |
| Reduced the height of the box and inset then extruded to get this look after that chamfer the top edges to get a nice round edge. |
 |
| Chamfer the bottom cushion to add roundness. |
 |
| Simple box sticks for the legs. |
 |
| Create a simple cushion to go behind your back. |
 |
| Set up a scene for the render and added some simple materials using mental ray's arch and design material. |

I enjoyed making this armchair because I've never made a chair before and it looks great,I've added a skylight to the scene which gives the leather patchiness where the light hits and this is a good effect and makes it look realistic.
This has improved my skills as a 3D designer and will assist me in further projects.
Mannequin

This is my mannequin I do not like it because it looks nothing like a human male torso because I had no idea how to create it.
To improve on this I could spend more time looking how to perfect it.
This has taught me when your stuck you should look on youtube because it's a great asset to any artist no matter how good there's always information to be learnt.
I am going to edit my mannequin because the pecks look like bricks so i'm going to make them mre rounded and natural.
 |
| This is a peck without turbo smooth on |
 |
| Turbo smooth makes it look a lot better |
 |
| This helps a lot but I still don't like it. |
 |
| This has helped but I still don't like it. |
Skills Brief
These are my 6 assets I am going to place into a scene.



Assets
Borderlands 2 Ammo Box
Ark Survival Evolved Metal Hatchet
Skyrim Anvil
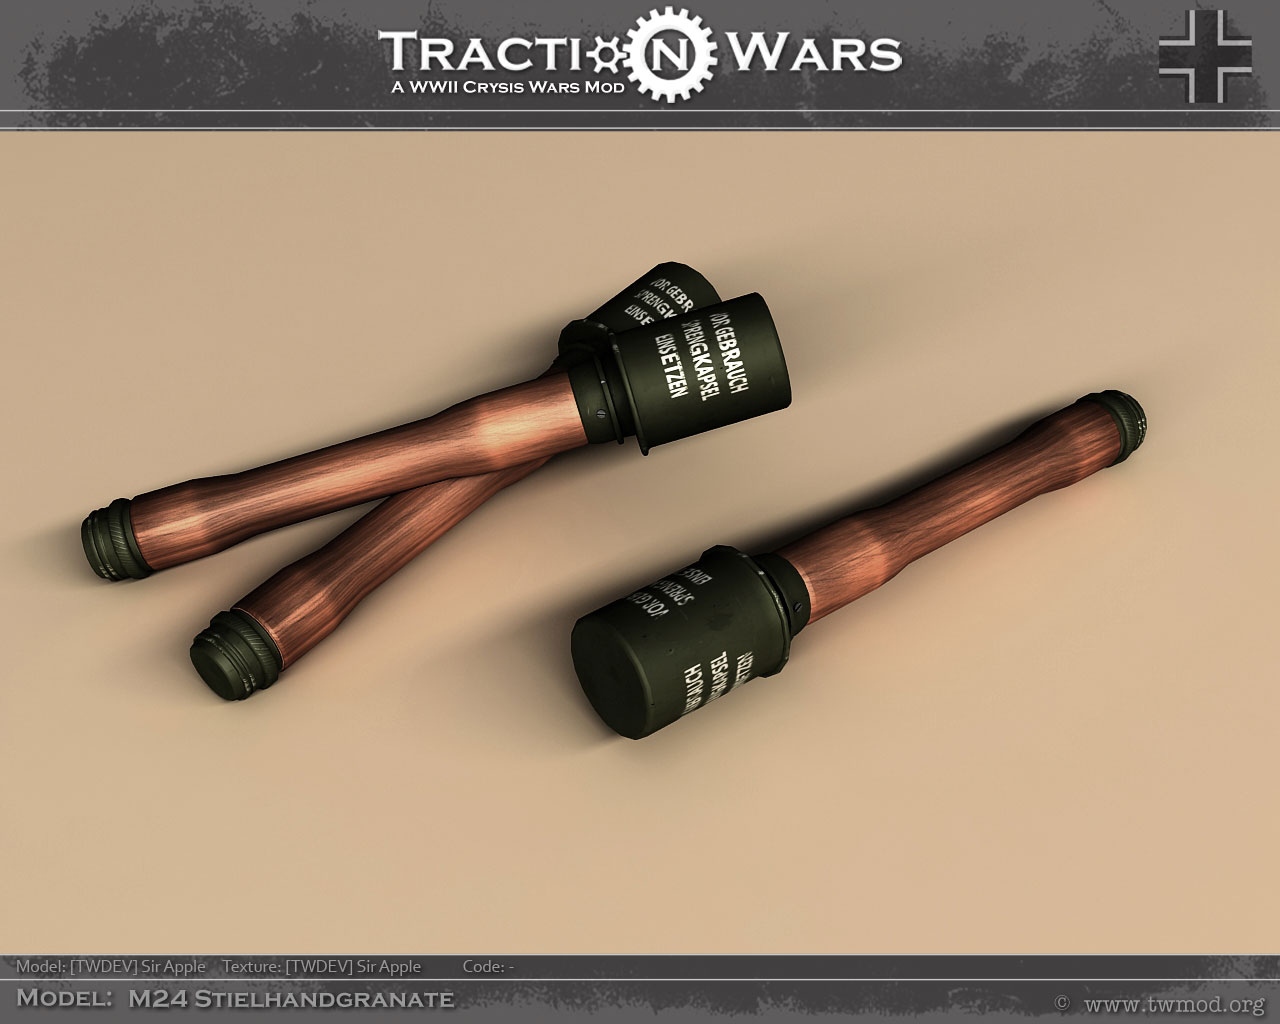
Traction Wars WW2 German Stick Grenade
Borderlands The Pre Sequel Class Mod
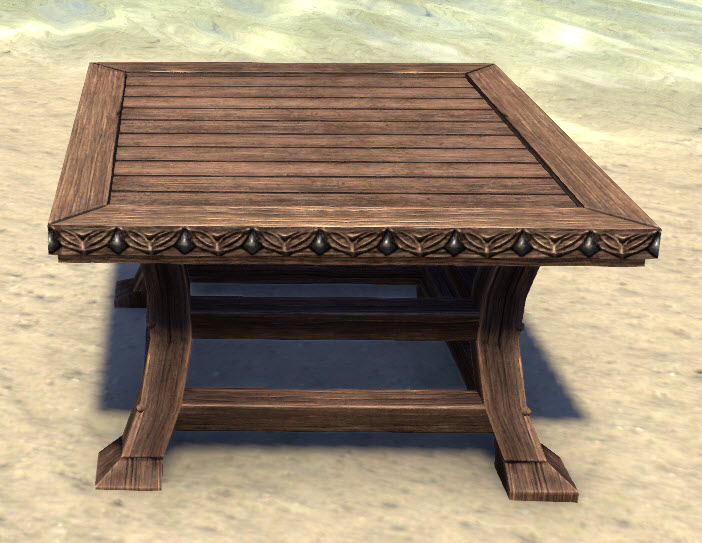
Elder Scrolls Online High Elf Table
I am going to start with my most simple asset which is the metal hatchet from Ark Survival Evolved.
 |
| Handel of the axe created using a cylinder and bevel and extruding it. |
 |
| Axe Head created from a box and editing the polys. |
 |
| Full Axe assembled. |
Now I need to texture it and I will paint my simple textures using Photoshop
 |
| This is the texture for the handle and should work fine. |
 |
| Texture for the axe head. |

This is my final render and now my metal hatchet is complete.
Next I will create the WW2 stick grenade.
 |
| To start I am going to use a cylinder and morph it using multiple techniques such as extrude,inset and bevel. |
 |
| Use Bevel to create where the grenade will be held. |
 |
| Extrude to make it longer and in proportion to a real one |
 |
| Create the top of the grenade where the powder is stored. |
I am going to texture it and try to uv some text onto it.
 |
| This is the base colour of all the parts that need to be green. |
 |
| This is the uv for the top of the grenade with the text. |
I am going to put multiple of my grenades next to each over and create a small scene.

Next I am going to create the anvil from Skyrim.
 |
| To create the log or stump that the anvil is sat on I will inset a cylinder. |
 |
| Extrude the inset in negative numbers. |
 |
| Start modelling the anvil using a box |
 |
| main shape of my anvil |
 |
| finished product. |
Final Render

Now I am going to create the CEO class mod from Borderlands.
 |
| Uv's for the class mod. |
 |
| Render with textures. |
 |
| Ambient occlusion render. |
 |
| Render on a floor. |
 |
| Ambient occlusion. |

These are my final renders however I didn't screenshot my progress but to create this it was pretty simple it started out with a box which I used chamfer on the edges to create the hexagon and used bevel to model the top.To create the circle in the middle i used proboolean which probably was not the best way but it was the fastest after that I used bevel on the face to get the shape in the centre.
The gadgets attached to the outside were made using simple boxes and editing their geometry.
Overall I enjoyed creating this piece for my scene and that's most likely why I forgot to screenshot my process.
My fifth asset will be the high elf table.
 |
| Started with a box inset the top face and extruded it inwards. |
 |
| Use the extrude tool plus the rotate tool to create the legs. |
 |
| Used the symmetry modifier to repeat it on the other side saving time. |
 |
| Render with mental ray texture on. |
 |
| Ambient occlusion render |
Evaluation
Our task for this brief was to pick 6 assets from 6 different games, model and paint them ourselves.
I enjoyed creating all these assets and will use them in future if I need them or If I want to make a scene I know I already have a few assets. My favorite asset would have to be the WW2 grenades because they look amazing and I am very proud of them, My second best asset would have to be the Class Mod from Borderlands The Pre Sequel because I enjoyed Painting over the UV's.
Most of the assets I have been inspired to re-create are from games I have put a lot of hours in such as Borderlands 2 and The Elder Scrolls Online. From doing this skills project I have learn't how to model different shapes and assets that I have never tried to make before and enjoyed working out The best way to model them.I didn't have any major problems when modelling and painting.
I think most of my assets look very similar to the original I tried my best when recreating to make them look the same and I believe I have succeeded in doing so .
Comments
Post a Comment